Internet(ppp0 ) == Modem(192.168.10.1 ) ==(192.168.10.2 )Ubuntu Server(192.168.1.10)==Lan(192.168.1.0/24)
Disini Modem difungsikan sebagai “ bridge mode” sehingga yang dial ke internet adalah Ubuntu server. Ubuntu Server sendiri dengan 2 interface , eth0 ke lokal dan eth1 ke modem.
Untuk koneksi saya gunakan speedy unlimited.
Ok kita anggap install ubuntu Server telah sukses...
login dlu ke root
sonny@server:/$sudo -i
sonny@server:/root$su
password:....................................................................................... ==masukkan password user
retype password:
root@server:~#passwd ==ubah dlu passwd root agar tdk sama dengan user
password:................................................................................... ==masukkan passwd root yang baru
retype password:
cek dan edit interface
root@server:~#ipmaddr
1: lo
inet 224.0.0.1
inet6 ff02::1
2: eth0
link 33:33:ff:bb:89:8e
link 01:00:5e:00:00:01
link 33:33:00:00:00:01
inet 224.0.0.1
inet6 ff02::1:ffbb:898e
inet6 ff02::1
3: eth1
link 33:33:ff:bc:84:65
link 01:00:5e:00:00:01
link 33:33:00:00:00:01
inet 224.0.0.1
inet6 ff02::1:ffbc:8465
inet6 ff02::1
Ok dech eth0 dan eth1 telah terdeteksi.
=== edit interface====
root@server:~# nano /etc/network/interfaces
--------------------------------------------------------------------------------------------------------------------------
auto lo
iface lo inet loopback
# The primary network interface
auto eth0 # edit dan sesuaikan dengan jaringan lokal
iface eth0 inet static # gunakan auto eth0 agar selalu up tiap booting
address 192.168.1.10
netmask 255.255.255.0
network 192.168.1.0
broadcast 192.168.1.255
dns-nameservers 127.0.0.1
post-up iptables-restore < /etc/iptables.up.rules #opsi untuk iptables
auto eth1
iface eth1 inet static
address 192.168.10.2
netmask 255.255.255.0
network 192.168.10.0
broadcast 192.168.10.255
kalau sudah tekan CTRL+ x dan tekan y untuk mengakhiri editor
dial ke modem dengan perintah pppoeconf
root@server:~# pppoeconf
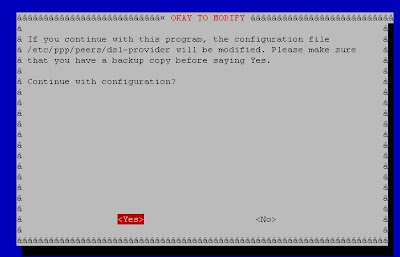
tekan enter untuk melanjutkan selanjutnya masukkan username dan password yang telah diberikan Telkom Speedy dan ikuti perintah selanjutnya. Jika sukses akan muncul interface ppp0
root@server:~#ifconfig
eth0 Link encap:Ethernet HWaddr 00:26:5a:bb:89:8e
inet addr:192.168.1.10 Bcast:192.168.1.255 Mask:255.255.255.0
inet6 addr: fe80::226:5aff:febb:898e/64 Scope:Link
UP BROADCAST RUNNING MULTICAST MTU:1500 Metric:1
RX packets:9392526 errors:0 dropped:0 overruns:0 frame:0
TX packets:13550889 errors:0 dropped:0 overruns:0 carrier:0
collisions:0 txqueuelen:1000
RX bytes:1623358868 (1.6 GB) TX bytes:2033394744 (2.0 GB)
Interrupt:16 Base address:0xbc00
eth1 Link encap:Ethernet HWaddr 00:26:5a:bc:84:65
inet addr:192.168.10.2 Bcast:192.168.10.255 Mask:255.255.255.0
inet6 addr: fe80::226:5aff:febc:8465/64 Scope:Link
UP BROADCAST RUNNING MULTICAST MTU:1500 Metric:1
RX packets:6695522 errors:0 dropped:0 overruns:0 frame:0
TX packets:6524187 errors:0 dropped:0 overruns:0 carrier:0
collisions:0 txqueuelen:1000
RX bytes:3489397024 (3.4 GB) TX bytes:894755461 (894.7 MB)
Interrupt:17 Base address:0xb800
ppp0 Link encap:Point-to-Point Protocol
inet addr:125.164.XX.XXX P-t-P:125.164.64.1 Mask:255.255.255.255
UP POINTOPOINT RUNNING NOARP MULTICAST MTU:1492 Metric:1
RX packets:448737 errors:0 dropped:0 overruns:0 frame:0
TX packets:422844 errors:0 dropped:0 overruns:0 carrier:0
collisions:0 txqueuelen:3
RX bytes:447552775 (447.5 MB) TX bytes:53406317 (53.4 MB)
=== cek interface lagi====
root@server:~#nano /etc/network/interfaces
---------------------------------------------------------------------------------------------------
auto dsl-provider
iface dsl-provider inet ppp
pre-up /sbin/ifconfig eth1 up # line maintained by pppoeconf
provider dsl-provider
------------------------------------------------------------------------------------------------
^ x untuk mengakhiri.
Setelah itu coba test ping ke google.com atau yahoo.com jika reply maka koneksi sudah sukses.
Aktifkan IP Forwading
== edit sysctl.conf===
root@server:~#nano /etc/sysctl.conf
cari hilangkan tanda “#” didepan tulisan dibawah ini :
---------------------------------------------------------------------------------------
net.ipv4.conf.default.rp_filter=1
net.ipv4.conf.all.rp_filter=1
net.ipv4.ip_forward=1
----------------------------------------------------------------------------------------
kalau sdh restart interface nya
root@server:~#/etc/init.d/networking restart
Aktifkan NAT Masquerade
root@server:~#iptables -A POSTROUTING -s 192.168.1.0/24 -j MASQUERADE
root@server:~#iptables-save
restart lagi interface nya
root@server:~#/etc/init.d/networking restart
Ok router sudah siap tinggal test dari client


No comments:
Post a Comment